
1. Either the Inventory or Assignments page. On the right side of the page, you will find the "Columns" section.

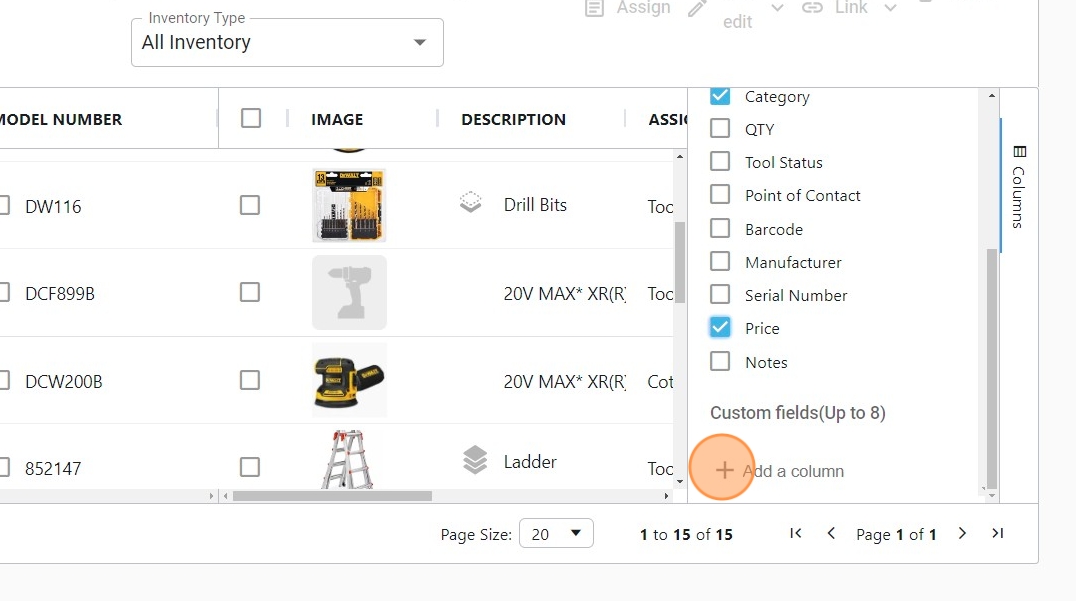
2. Click on the "Columns" to open the list of Set Columns. To hide or show a column, simply check or uncheck the corresponding checkbox.

Adding a Custom Fields
3. Scroll down the Set Columns list to find the section for custom fields. You can add up to 8 custom fields to the table. To add a custom field, click on the "+ Add a column" button.
4. A text field will appear where you can enter the name of the custom field you want to add. For example, if you want to add a column for the tool year, enter "Tool Year" in the text field. Press the "Enter" key to confirm the name.

5. To see the custom field in the table, check the checkbox labeled next to the newly added column.

6. To add information to the custom field for a specific tool, click on the tool in the table.

7. Scroll down to the "Asset Details" section. You will now see the custom fields you created. Enter the relevant information in the custom field. And click on the "Save Changes" button to save the updates.

8. The information will be updated under the created custom field.

Join our Community!
We are excited to continue the discussion about Site Manager in our community forum. Contribute ideas, make suggestions, and discuss with other like minded asset managers. Click here!
Comments
0 comments
Article is closed for comments.